How to Move a Surface Plate..(up some steps)..
Posted: September 19, 2014 Filed under: Uncategorized | Tags: Brazing, crane, frame building, how to move a surface plate, surface plate, surface table Leave a commentSo after I’d finally bagged myself a large workshop in a factory nearer to my home, a few weeks back I needed to move my cast iron surface plate off the island on the River Thames, which involved negotiating 17 steps up onto the footbridge that leads to the road.
This time I knew how to do it.
I’d need:
A “Euro 3” sized pallet
Some OSB to strengthen the pallet for winching
Some timber offcuts to screw into the pallet around the plate to prevent it from sliding
Some pieces of wood to stand the pallet on (I’ll explain)
4 Ratchet straps
2 Lifting slings
An engine hoist (Ebay bargain)
A pallet jack (found in a skip by a friend)
A Tirfor winch with anchoring straps (borrowed from my dad’s tree surgery business)
2 sheets of plywood
Use of the mahoosive crane in the building site over the bridge
To put the surface plate on the pallet, I had to lift it off the stand with the engine hoist and slings. The hoist is only rated up to 500kg, and I calculated that the 4ftx3ft plate is more like 650kg, with a 2 inch thick solid plate and all the strengthening cast webs and edging below that to complete the plate structure.
I hoped that the hoist makers had allowed some safety margin..
Now the hoist legs would sort of fit underneath the stand’s cross members at a certain angle, so getting it off the stand wasn’t too difficult. I was very careful not to sway the load much.
Because the hoist legs and wheels wouldn’t fit into the pallet slots, I had to put the pallet width-ways on top of the hoist legs, and then lower the plate onto it.
Next, I put the pallet jack underneath the pallet and jacked it up off the legs, after strengthening the pallet a bit by jamming some wooden blocks into the fork slots.
I now had to lower the pallet onto 4 small stacks of plywood, one under each corner. This gave me just enough room to pull out the pallet jack, and then re-insert the forks into the slots of the pallet. I could then jack it up, remove the plywood from underneath the pallet, and finally lower the pallet to the ground.
I placed the wooden cover on the plate and ratchet strapped it to the pallet. I used some wood offcuts (handy being in a woodworking shop sometimes) to screw around the plate to further secure it.
Now the fun began!

Firstly I had to protect the steps and provide a smooth ramp to drag the plate over. I moved the last sheet to the front and repeated, Stonehenge style.

The view from the quayside.

Setting up the winch cable, and anchoring it to the top bridge member.

Here I’ve lined up the pallet with the plywood ramp.

Now it was time to unleash the power cannons. Ahem.

With a bit of a groan, she started to move.

It really went pretty easily. Lots of lessons were learnt when I brought it down to the island, so I knew how to do it with as little fuss as possible.

The anchoring straps were spaced evenly, which helped the pallet move in a straight line.

Almost there..

There we go, job done. The pallet jack will roll this across the bridge now with very little effort.

I stand heroically before my triumphant victory.!
At the other side of the bridge, the building site crane driver did me a favour and lifted it over the fence so that the pallet courier could collect it easily and take it to the new workshop:

“ere mate, gizza lift wiv yer crane!”

Work smart, not hard!

Cheers fella!
The new place is nearly ready for frame building work to begin. A frame jig is on order from Sputnik Tool, the gas cylinders are set up, and I’ve been making benches with lots of help from the wifey. There’s a fully equipped machine shop on site at my disposal, and John, the factory owner is giving me lots of great training in machining and toolmaking.
Bye for now,
Matt
A Trip To The Bicycle Academy
Posted: September 2, 2014 Filed under: Uncategorized 1 CommentI decided that in order to try and take my brazing to the next level, some tuition would be a good investment, and so I signed up for the Bicycle Academy’s Fillet Brazing Masterclass.
I was keen to get some one-one training from Andrew as I’d heard great things about his courses.
Being far too mean to pay for a hotel, I laid down five quid a night to stay at a local campsite, “Vallis Veg”.

The campsite in Frome, Somerset. I was the only person there. I got a bag of firewood and made a fire in the car wheel provided. During the night a field vole came and snuffled around me.
Some might ask why I needed brazing tuition when I work as a production brazer for Brompton. My reasons were:
1. I’d never had a specialised brazing class before, as college courses I’d studied were more welding-orientated.
2. Brazing tuition at the bike factory is more of a “you’ll find your way, just practice more” approach.
3. I wanted to learn brazing in relation to more conventional bike frames, especially with regard to best practices for tacking, making smooth fillets around the whole BB cluster, etc.
4. Brazing at work to tight targets usually requires a very large flame, which isn’t always the best way to achieve the nicest fillets. Certainly not with thinner-walled tubing.
5. I wanted to take a course where someone could critique and advise me on my technique as I worked.
6. I simply don’t get time to try new techniques and experiment at work. If I try a new technique, I may not hit target, or I may have to scrap a part, or both.
Here are some of my efforts from the class:

Andrew talked me through laying a nice fillet.

We spotted that I was bridging my fillet a bit, and we cured it there and then. Andrew has developed some techniques to get a smooth start and finish.

I managed to pull my bead tighter under instruction.

We covered tacking, making full fillets that can be filed easily if required, and recommended fillet throat depths.

It felt weird to be allowed to take time over my brazing!

Back to Skool.. I found it helpful to make notes and sketches.

This is the torch I used in the class.
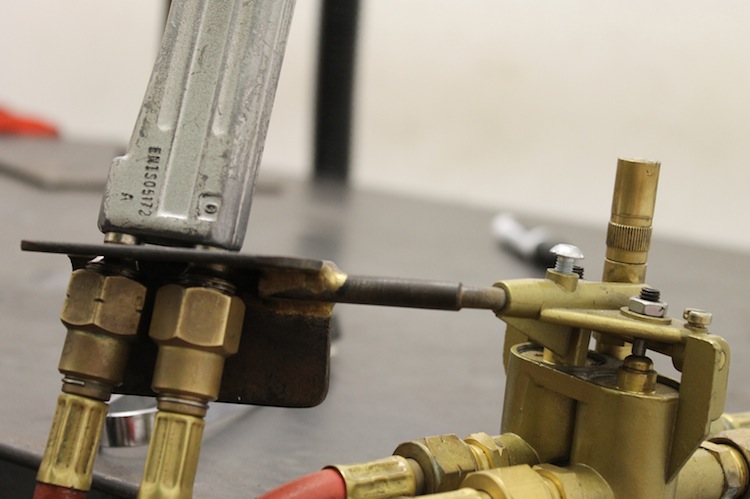
Neat economiser setup.

A Gasfluxer puts flux into the acetylene so powder/paste flux is only needed where capillary joining is required.

It’s not all work, work, work.. An apprentice takes aim with a Nerf gun!

Quite a cool way to diffuse the frustrations of frame building.

The Academy offers cycle fit/sizing courses. Here lead weights are attached to the wheel rim of this sizing frame to more realistically simulate spin up and spin down. Resistance can also be adjusted.

There are lots of tubes in stock.

All the lugs, crowns and braze-ons a student could dream of.

This sight was familiar to me as I sanded tubes daily during my 10 months as Brompton’s Repair Brazer before I moved to production brazing.

A Sputnik Tool frame jig, like the one I’ve ordered. Except I’ve ordered more standoff on Andrew’s recommendation.

Academy Tools’ own frame jig is in development and should be available to buy soon.

A surface plate with stays and various bits ‘n’ bobs.

An evil Nerf gun lies menacingly on a fly press set up to dimple stays for chainring clearance.

Balance bikes made for children by students have been painted and will soon be enjoyed..

Be careful folks..

All the tools you’ll need.

Crowdfunded!

Africa bikes hang on the wall, each one made by a past student.

Staff and students chat by the kitchen/coffee area. I found it a really nice environment to learn in.

A student finishes his frame.
brazed inserts allow a 1 inch steerer to be used in a large diameter head tube. This allows for easier brazing without ovalising the downtube on the Africa bikes.

Another view of the workshop. Photos of some past pupils are stuck on the wall to the rear.

A pupil’s leaf design seatstay cap.

There were some interesting items and books on display.

Riding back to the campsite, there was a beautiful purple sky.

Frome is a lovely place to ride around. Even at night.

I got back to the tent just before dark.

Next morning, after a coffee in the town I rode out to Longleat. I saw these hops growing wild in a hedgerow.

It was a really fun descent to the house.

..Then a big climb out again after a visit to the cafe.
All in all, I felt that my visit to the Bicycle Academy was good value, interesting and fun, and I would definitely recommend the fillet brazing masterclass, not just to those with less experience, as it is bound to give a good foundation, but to more experienced brazers too. I felt like I was stuck in a bit of a rut with my brazing and wasn’t sure how to improve. I have taken tips and advice to my own brazing with very good results.
http://www.thebicycleacademy.org/
Moulton rack repair
Posted: September 2, 2014 Filed under: Uncategorized 4 CommentsI did this rack tube replacement for a local bike shop. I’m getting quite a lot of interest in frame repairs at the moment.
This is a Moulton Super Four bike. The rack tube doesn’t pierce the seat tube like on the larger models, thankfully.
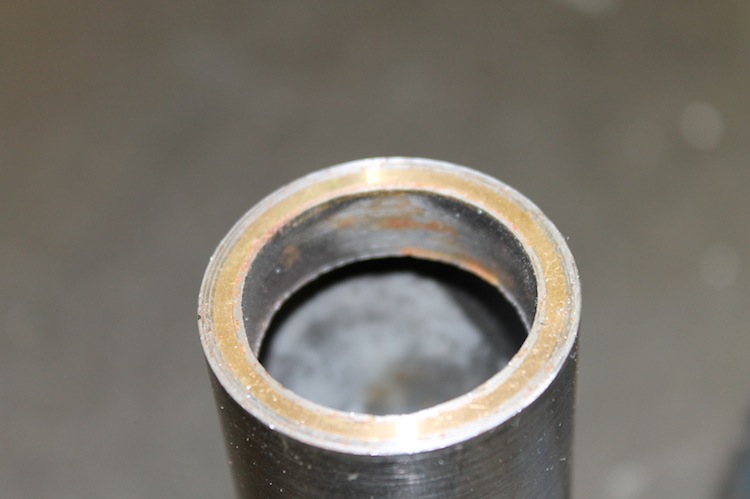
A probable casualty of carrying a pillion passenger, the original main rack tube was bent down, sheared and corroded. I forgot to take a picture of the original condition, but you get the idea. It took a lot of pulling and setting of the other rack members and I also filled a few dents with brass. I had to take measurements for the pump peg locations. the rear of the tube had to be ovalised in a vice with my plywood tube ovaliser.


